Twingate Triumph: One Gate, Two Gate, Red Gate, TwinGate!
In a world where rogue AIs roam free and Python scripts run wild, there exists a gate. This gate isn’t your ordinary, run-of-the-mill gate; it’s majestic and beautiful, described by some as a “Twingate”.
But what makes this gate so splendid and majestic? That, my friends, is what we’re about to explore. So strap in, grab that grape soda, and join me for this week’s installation guide, for we’ve definitely taken the red pill on this one.

Before diving into the installation process, let’s first uncover what Twingate is all about. Twingate is a modern remote access solution that replaces traditional VPNs with a zero-trust approach. It provides secure, seamless access to internal resources without exposing them to the public internet. But what exactly is zero trust? It’s a security concept based on the idea that organizations should never automatically trust anything inside or outside their perimeter. Instead, they should verify and authenticate every user, device, and application trying to access their network, regardless of whether they are inside or outside the corporate network. In essence, zero trust means never trusting, always verifying.
TL;DR, much safe, many wow.
Now that we have a better understanding of Twingate and zero trust, let’s dive into the installation process.
First things first, you’ll need to stand up a Linux system. Pick your favorite server OS (I’m partial to Ubuntu, by the way) and build that VM out. I won’t be covering the VM setup process here, as it can vary depending on your system and preferences. Once you have your VM up and running, head over to Twingate.com and click on the “Try for Free” button in the top right, or use this handy link here.
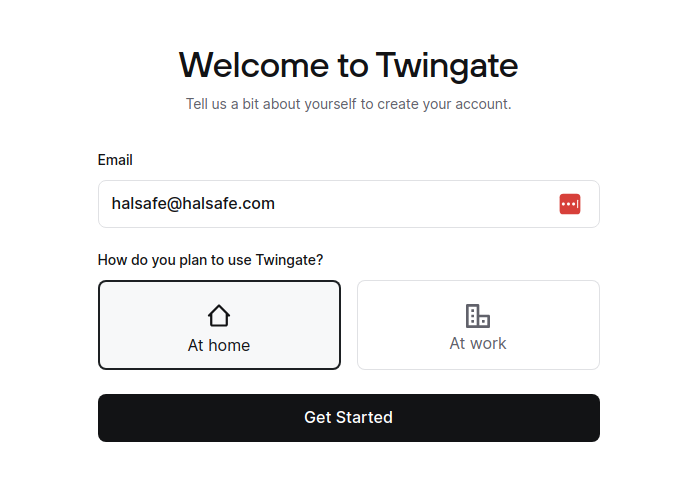
Drop in your email and select “At home” and we can then move on by selecting “Get started”.

Just in case anyone’s feeling extra curious, here’s a burner email address for you. My main inbox is like Fort Knox, so don’t even try 😉
You’ll be now asked to pick what use case makes the most sense and enter where you learned about Twingate from. It is very crucial that you drop my URL (Please sponsor me, Twingate!). For our uses, we will choose “Homelab” from the list.

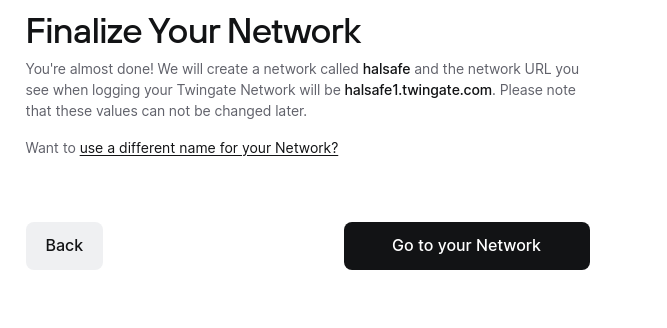
Once you click continue, you’ll see the finalization options presented. Be sure to save your URL in the text, you’ll need this! Once you notate that URL down, click on “Go to your Network”.

Now is when you get to pick what sign-in method you would like to use. For this, I am going to use Github because big bad dev over here.

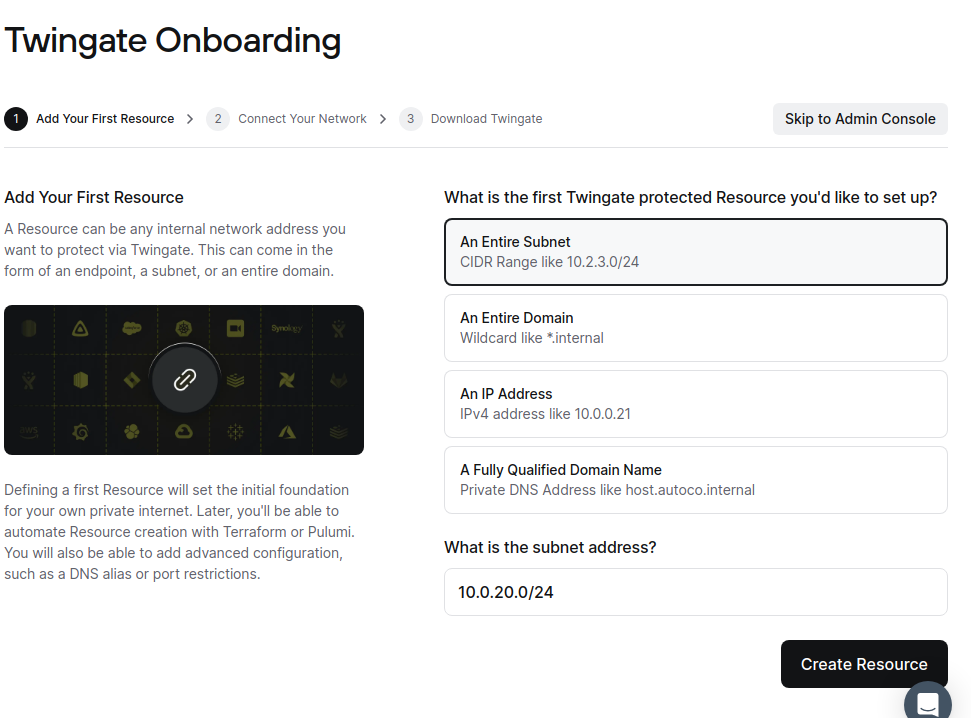
Once you’ve gotten through your sign in method setup, you’ll be welcomed to the Admin page. Click on “Start Setup” and we can proceed. This is really where Twingate shines in my opinion. You can choose from an entire subnet, an entire domain, a specific IPv4 addess, or a FQDN. For this, I will be doing a subnet. Enter your subnet range in CIDR notation (10.0.0.0/24, 10.0.20.0/24, 10.0.30.0/24 are some examples). Click “Create Resource” once you’ve entered the subnet. Don’t worry, we can add more later!

Now we can connect our network to Twingate. For this one, you can either choose Docker or Linux. If you picked Docker, make sure you have docker installed on your server! I’ve done both before, and I honestly prefer the Linux install. Docker is good and all, I prefer the Linux install for its simplicity. Scroll down to Step 2 and click on “Generate Tokens” and then “Authenticate”. Anytime you create new tokens, you will need to be authenticated.
Scroll down a bit more to Step 3. This is useful if you have a SIEM. It is not necessary though. Next up is, you guessed it, Step 4. Copy the command and paste it into your terminal.

Once you have pasted the command into your terminal, hit enter and wait a few seconds. I ran into this before and noticed it wasn’t easy to see at first, but enter your sudo password and hit enter again. Let it run and then check the Admin page again. You should see a “Network connected” page now. Click on “Continue”. Now you’ll see the downloads. These are pretty easy step by steps, so I won’t be talking about these here. You should now see your Network overview page. If not, click “Skip to Admin Console”. Congrats, you have setup Twingate! Now lets get to the extra configs.
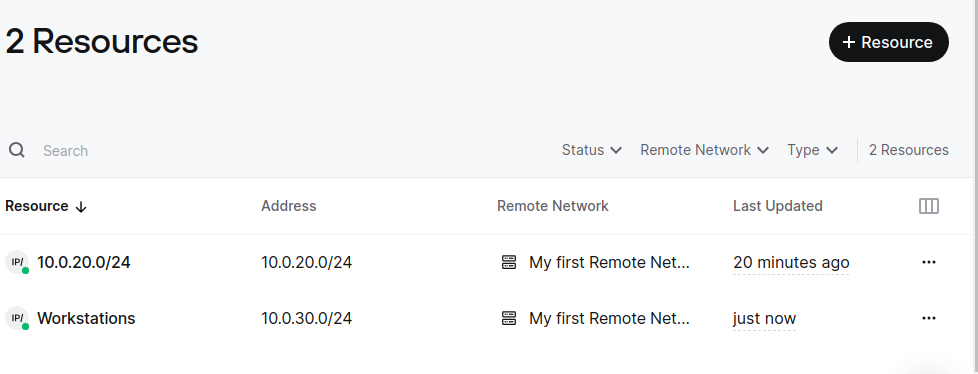
To add additional subnets to your connection, click “Resources” under the “Network” tab and then “+ Resource”. Enter the subnet in CIDR notation and give it a name. Make sure you click on the top left box an d select your network. Once done, click “Create resource”. You’ll now be asked to select groups that can access it. For now, we can choose “Everyone” as it will only be used for us and then “Grant Access”.

You should now see your Resources listed. Repeat to add more subnets.

If you want to add more connectors (Twingate recommends having two connectors, get it – two connectors would be twins, for redundancy but you can get away with one) click on “Remote Networks” and then select your remote network. On the left side, click “Add Connector” to add a new connector and repeat the same steps we did above for creating the first connector.
And that’s it! You now have a fully functional Twingate connection, allowing you to securely access your network from anywhere. It’s been a game-changer for me over the past 9 months, and I’m sure you’ll find it just as valuable.
So go ahead, unleash the power of Twingate, and join the ranks of the securely connected.
